How to generate Keys and Access Tokens for Twitter
How to generate Keys and Access Tokens for Twitter
1. Visit the Twitter Developers App Site
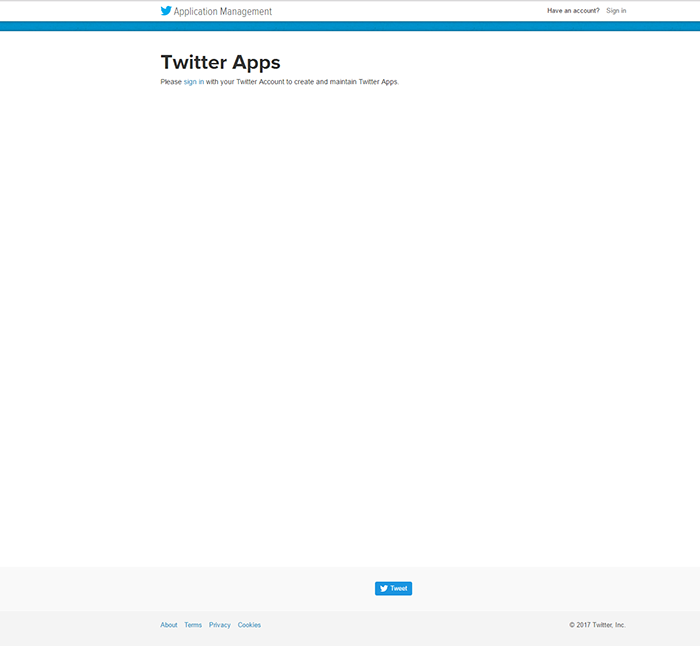
The first thing you need to do is head on down to apps.twitter.com. In order to create an account, all you need to do is click on the “Sign in” link at the top right.
2. Sign in with your Twitter Account
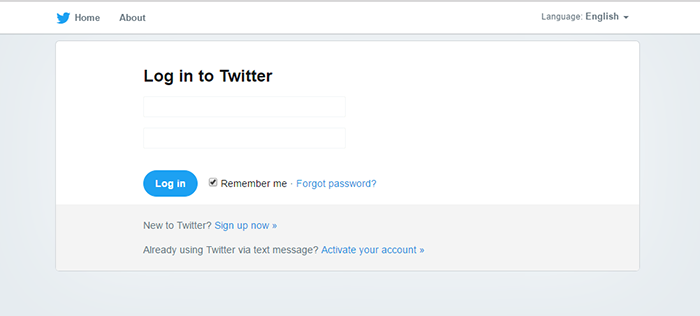
Next, sign in with the Twitter account you want to associate with your app. You do have a Twitter account don’t you?!
3. Go to “My Applications”
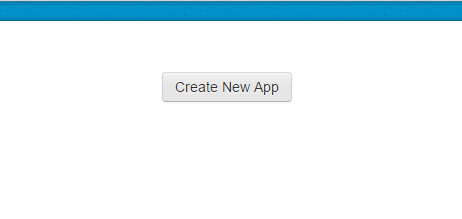
Click on "Create New App".
4. Fill in the Application data
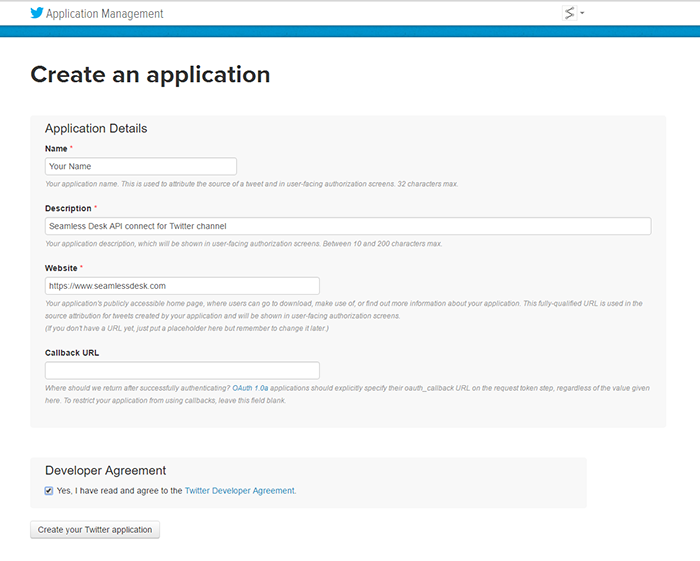
Fill in the fields as follows
- Name: - This is just the name of your app, you can call it whatever you want.
- Description: - "Seamless Desk API connect for Twitter channel"
- Website: - "https://www.seamlessdesk.com"
- Callback URL: - Leave blank.
Agree to the terms and click on "Create your Twitter application"
5. Get your Keys and Access Tokens
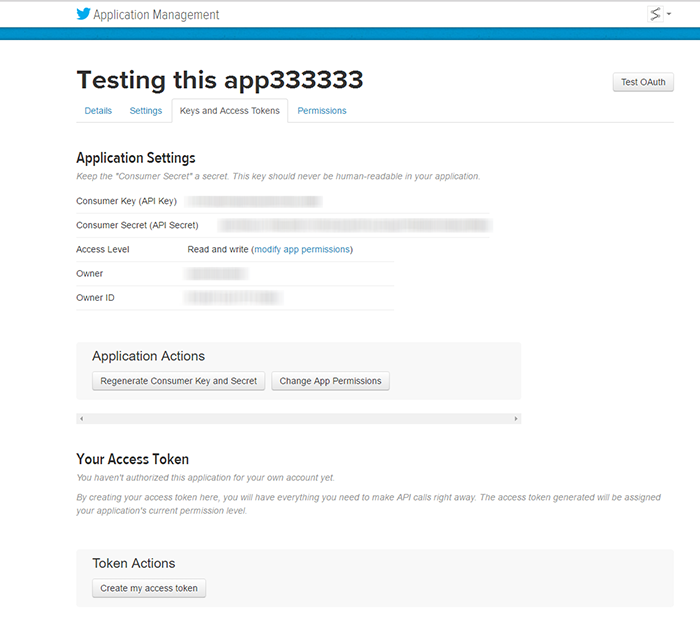
Once logged in click on the tab up top labeled "Keys and Access Tokens". At this point you have your Keys which you can see at the top of the page labeled as "Consumer Key (API Key)" and "Consumer Secret (API Secret)". Save those for later.
Very Important:
Make sure that Access Level is set as "Read and write".
6. Create your Access Tokens
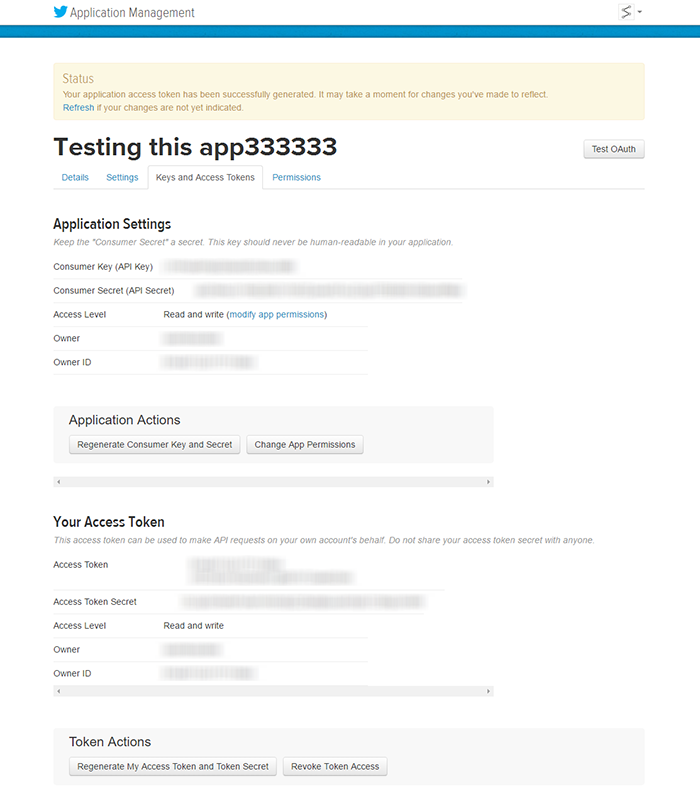
At the bottom of the page you should see a button "Create my access token" Click on that and this will generate your access tokens for your application.
At this point you know have everything you need to enter into Seamless Desk to get your Twitter channel going.
7. Head over to Seamless Desk Twitter Settings
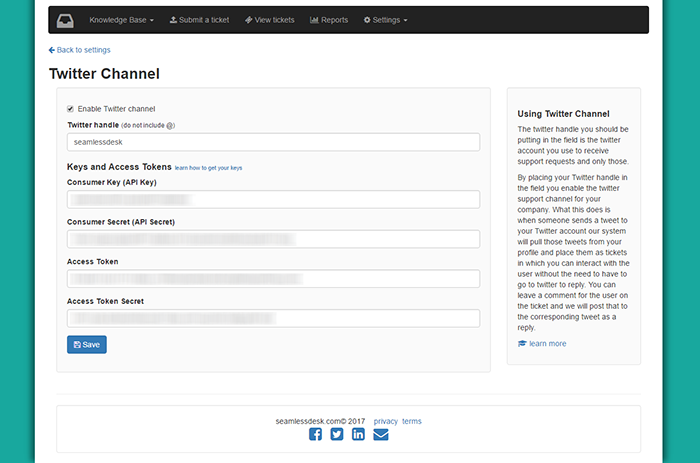
Go to "Settings > Site Settings > Twitter"
Enable the Twitter channel and enter the corresponding keys to the fields which are labeled just like they are on your Twitter apps settings page.
Save your settings and you are done! Our scripts will start checking your twitter page for new support tweets.
For best practices it is wise to have a Twitter page dedicated to support only.
1. Visit the Twitter Developers App Site
The first thing you need to do is head on down to apps.twitter.com. In order to create an account, all you need to do is click on the “Sign in” link at the top right.
2. Sign in with your Twitter Account
Next, sign in with the Twitter account you want to associate with your app. You do have a Twitter account don’t you?!
3. Go to “My Applications”
Click on "Create New App".
4. Fill in the Application data
Fill in the fields as follows
- Name: - This is just the name of your app, you can call it whatever you want.
- Description: - "Seamless Desk API connect for Twitter channel"
- Website: - "https://www.seamlessdesk.com"
- Callback URL: - Leave blank.
Agree to the terms and click on "Create your Twitter application"
5. Get your Keys and Access Tokens
Once logged in click on the tab up top labeled "Keys and Access Tokens". At this point you have your Keys which you can see at the top of the page labeled as "Consumer Key (API Key)" and "Consumer Secret (API Secret)". Save those for later.
Very Important:
Make sure that Access Level is set as "Read and write".
6. Create your Access Tokens
At the bottom of the page you should see a button "Create my access token" Click on that and this will generate your access tokens for your application.
At this point you know have everything you need to enter into Seamless Desk to get your Twitter channel going.
7. Head over to Seamless Desk Twitter Settings
Go to "Settings > Site Settings > Twitter"
Enable the Twitter channel and enter the corresponding keys to the fields which are labeled just like they are on your Twitter apps settings page.
Save your settings and you are done! Our scripts will start checking your twitter page for new support tweets.
For best practices it is wise to have a Twitter page dedicated to support only.