Branding your SeamlessDesk portal is easy and in this article, we’ll show you how to get started.
Adding a Logo
1. Go to the Service Desk Branding section to upload your logo. Once added, it will display your organization’s logo throughout the portal. (for best results, try and use an image that is 250×250)

2. Click on “Change Logo”
3. Click on “Browse” to pick your logo from your computer.
4. You have the option to rotate the image if you need to.
5. When done, click “Save.”
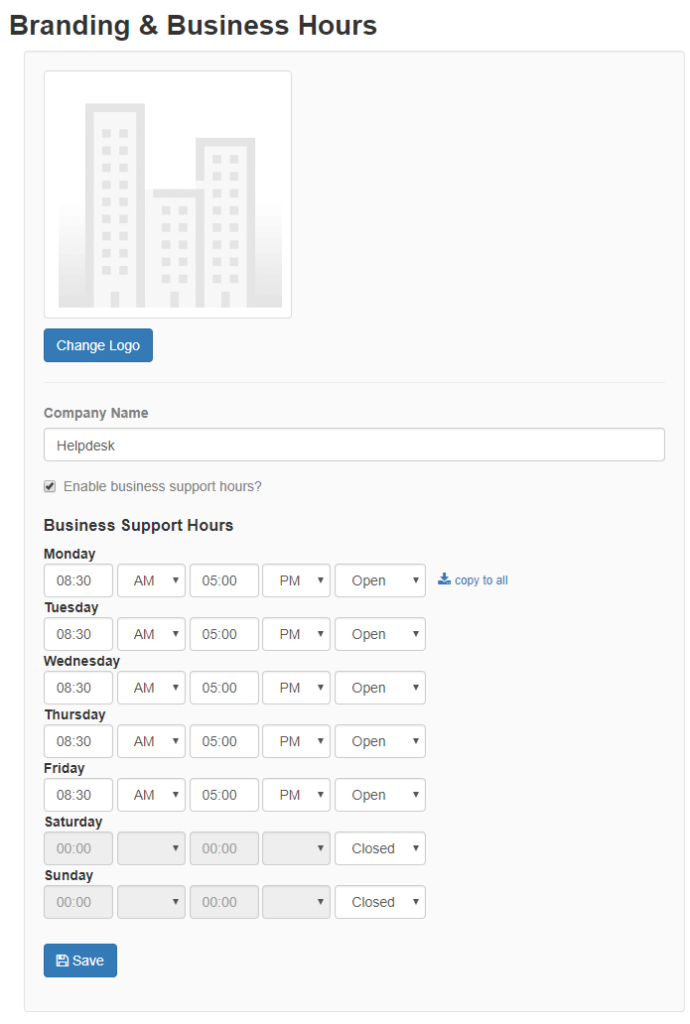
Business Hours
Before you leave the Service Desk Branding section, let’s add your business hours (if needed). Note: if your business operates 24/7, you do not need to modify any settings. Leaving the Business Support Hours off will default to a 24/7 style operation.
- To turn on Business Support Hours, toggle the “Enable support hours” on.
- Edit each day, according to your organization’s hours of operation.
- Click “Save” when finished.
Timezone
The configuration of your Timezone settings should already have been completed when you first created your account.
If, for whatever reason, you need to modify your Timezone settings, go to Settings > General Settings section > Regional Settings. Here you can also adjust your default language and your date format. Once you have completed configuring your settings, click “Save.”

If you need any assistance or if you have any questions, please contact SeamlessDesk support at Support@seamlessdesk.com.